

Installing an SMA connector might seem like a daunting task, especially if you're new to the world of RF (Radio Frequency) technology. As a trusted SMA connector supplier, I've seen firsthand the importance of a proper installation. A well - installed SMA connector ensures optimal performance, reduces signal loss, and extends the lifespan of your equipment. In this blog, I'll guide you through the step - by - step process of installing an SMA connector, whether it's for a PCB (Printed Circuit Board) or a cable.
Understanding SMA Connectors
Before we dive into the installation process, let's briefly understand what SMA connectors are. SMA stands for Sub - Miniature version A. These connectors are widely used in RF applications due to their excellent electrical performance up to 18 GHz, and in some cases, even higher frequencies. They are known for their threaded coupling mechanism, which provides a secure connection and helps prevent accidental disconnection.
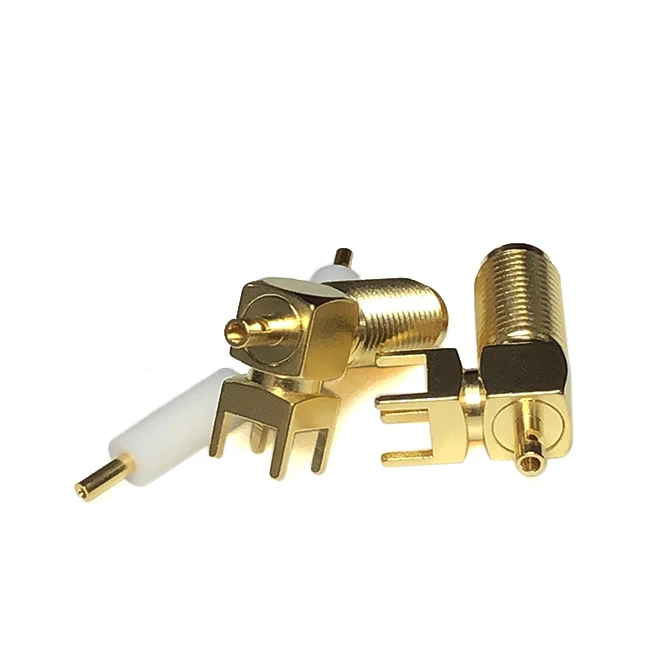

There are different types of SMA connectors available in the market. For instance, we offer RF Connector SMA Female PCB Mount SMA - KE, RF Connector SMA Female PCB Mount SMT SMA - KE SMT, and RF Connector SMA Female Right Angle PCB Mount with 1.13 Cable SMA - KWE 1.13. Each type is designed for specific applications, so it's crucial to choose the right one for your project.
Tools and Materials Needed
To install an SMA connector, you'll need the following tools and materials:
- SMA Connector: Select the appropriate SMA connector based on your application requirements.
- Soldering Iron: A good quality soldering iron with a fine tip is essential for precise soldering.
- Solder: Use a high - quality solder with a suitable melting point.
- Wire Strippers: To strip the insulation from the cable.
- Flux: Flux helps in the soldering process by removing oxidation and improving the flow of solder.
- Cable: The cable you'll be connecting the SMA connector to. Make sure it's compatible with the SMA connector.
- Heat Shrink Tubing: This is used to provide insulation and protection after soldering.
- Pliers: For holding the connector and cable during the installation process.
Installing an SMA Connector on a Cable
Step 1: Prepare the Cable
The first step is to prepare the cable. Use the wire strippers to carefully remove the outer insulation of the cable. Make sure not to damage the inner conductor or the shielding. The length of the stripped insulation will depend on the type of SMA connector you're using. Generally, you'll need to expose a few millimeters of the inner conductor.
Step 2: Apply Flux
Apply a small amount of flux to the exposed inner conductor and the shielding of the cable. Flux helps in the soldering process by preventing oxidation and ensuring a good solder joint.
Step 3: Insert the Cable into the Connector
Insert the prepared cable into the SMA connector. Make sure the inner conductor is properly aligned with the center pin of the connector, and the shielding is in contact with the outer part of the connector.
Step 4: Solder the Connection
Heat the soldering iron and touch the tip to the joint between the inner conductor and the center pin of the connector. Once the area is hot enough, apply the solder. The solder should flow smoothly and form a solid connection. Repeat the process for the shielding, soldering it to the outer part of the connector.
Step 5: Inspect the Joint
After soldering, inspect the joint to ensure there are no cold solder joints or shorts. A cold solder joint is characterized by a dull, grainy appearance and poor electrical conductivity. If you notice any issues, re - heat the joint and add more solder if necessary.
Step 6: Apply Heat Shrink Tubing
Slide a piece of heat shrink tubing over the soldered joint. Use a heat gun to shrink the tubing, providing insulation and protection to the joint. Make sure the tubing covers the entire soldered area.
Installing an SMA Connector on a PCB
Step 1: Prepare the PCB
Clean the PCB where the SMA connector will be installed. Remove any dirt, dust, or oxidation from the pads. This ensures a good electrical connection between the connector and the PCB.
Step 2: Position the Connector
Place the SMA connector on the PCB, aligning it with the pads. Make sure it's properly seated and centered. You can use a small amount of solder on one of the pads to hold the connector in place temporarily.
Step 3: Solder the Connector
Once the connector is positioned correctly, start soldering the pins to the pads on the PCB. Apply a small amount of flux to each pin and pad before soldering. Heat the soldering iron and touch the tip to the joint between the pin and the pad. Apply the solder, allowing it to flow and form a solid connection. Repeat this process for all the pins.
Step 4: Inspect the Soldering
After soldering, inspect the joints to ensure they are clean and free of shorts. Check for any signs of over - soldering or cold solder joints. If necessary, re - work the joints to ensure a proper connection.
Testing the Installation
After installing the SMA connector, it's important to test the connection to ensure it's working properly. You can use a network analyzer or a spectrum analyzer to measure the electrical performance of the connector. Check for parameters such as return loss, insertion loss, and impedance matching. If the results are not within the acceptable range, there might be an issue with the installation, and you'll need to re - check the connections.
Tips for a Successful Installation
- Practice Makes Perfect: If you're new to soldering, it's a good idea to practice on some scrap cables and connectors before working on your actual project.
- Keep it Clean: Make sure all the components, including the cable, connector, and PCB, are clean before soldering. Dirt and oxidation can affect the quality of the solder joint.
- Use the Right Tools: Invest in good quality tools. A cheap soldering iron or low - quality solder can lead to poor connections.
- Take Your Time: Don't rush the installation process. Soldering requires precision and patience.
Conclusion
Installing an SMA connector is a skill that can be mastered with practice. By following the steps outlined in this blog and using the right tools and materials, you can ensure a successful installation. As a leading SMA connector supplier, we're committed to providing high - quality connectors and support to our customers. If you have any questions or need assistance with your SMA connector installation, feel free to reach out to us. We're here to help you with your RF connector needs and can offer advice on the best products for your specific applications. Whether you're working on a small DIY project or a large - scale industrial application, we have the right SMA connectors for you. Contact us today to start a procurement discussion and find the perfect solution for your project.
References
- "RF Connectors: Basics and Applications" - A technical guide on RF connectors and their applications.
- "Soldering Techniques for Electronics" - A comprehensive book on soldering techniques for electronic components.