

Installing a TNC connector on a coaxial cable is a crucial skill for anyone working with RF (Radio Frequency) systems. Whether you're setting up a wireless network, a radio communication system, or any other RF application, a properly installed TNC connector ensures reliable signal transmission. As a TNC connector supplier, I'm here to guide you through the step-by-step process of installing a TNC connector on a coaxial cable.
Understanding TNC Connectors
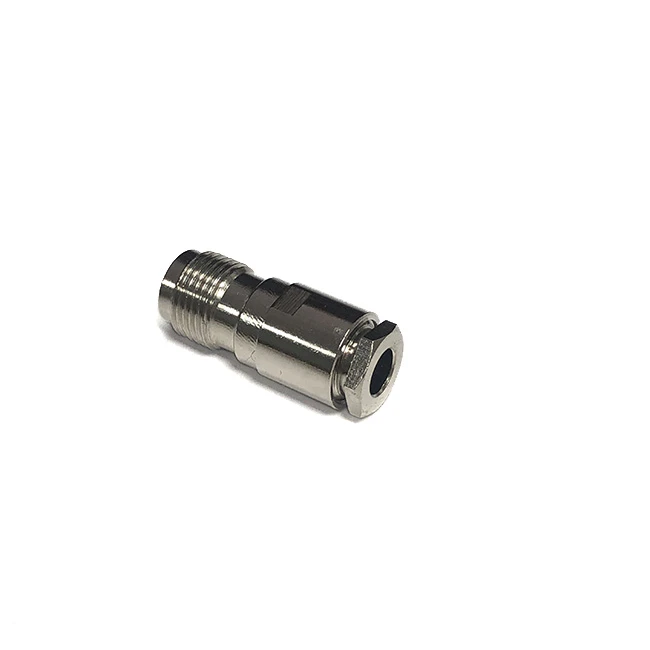
Before we dive into the installation process, let's briefly understand what TNC connectors are. TNC (Threaded Neill-Concelman) connectors are a type of RF connector commonly used in high-frequency applications. They are similar to BNC connectors but feature a threaded coupling mechanism, which provides a more secure connection and better performance at higher frequencies. TNC connectors come in both male and female versions and can be used with various types of coaxial cables, such as RG58, RG6, and LMR195.
Tools and Materials You'll Need
- Coaxial cable: Choose the appropriate coaxial cable for your application. Make sure the cable's impedance matches the requirements of your RF system.
- TNC connector: Select the correct TNC connector for your coaxial cable. You can find a wide range of TNC connectors on our website, including TNC Male Connector for RG58 LMR195 Clamp Type TNC-J3 and Reversed Polarity TNC Male Connector for RG58 Connector.
- Coaxial cable stripper: This tool is used to remove the outer insulation, braid, and dielectric layer of the coaxial cable without damaging the inner conductor.
- Crimping tool: A crimping tool is required to attach the TNC connector to the coaxial cable. Make sure the crimping tool is compatible with the type of TNC connector you're using.
- Wire cutters: You'll need wire cutters to trim the excess cable and braid.
- Screwdriver: Some TNC connectors may require a screwdriver to tighten the coupling nut or other components.
Step-by-Step Installation Process
Step 1: Prepare the Coaxial Cable
- Measure and cut the coaxial cable to the desired length using wire cutters. Make sure to leave enough cable for the connector installation.
- Use a coaxial cable stripper to remove the outer insulation of the coaxial cable. The length of the stripped section will depend on the type of TNC connector you're using. Refer to the connector's installation instructions for the recommended stripping length.
- After removing the outer insulation, you'll see the braid layer. Carefully separate the braid from the dielectric layer and fold it back over the outer insulation.
- Next, use the coaxial cable stripper to remove the dielectric layer, exposing the inner conductor. Again, refer to the connector's installation instructions for the recommended length of the exposed inner conductor.
Step 2: Assemble the TNC Connector
- If your TNC connector comes in multiple parts, such as a coupling nut, body, and contact pin, assemble them according to the connector's installation instructions. Make sure all the parts are properly aligned and tightened.
- Slide the coupling nut and any other components onto the coaxial cable before attaching the connector body. This will make it easier to install the connector later.
Step 3: Attach the TNC Connector to the Coaxial Cable
- Insert the exposed inner conductor of the coaxial cable into the contact pin of the TNC connector. Make sure the inner conductor is fully inserted and centered in the contact pin.
- If the TNC connector uses a crimping method, place the connector body over the coaxial cable and align it with the braid layer. Use a crimping tool to crimp the connector body onto the coaxial cable. Apply enough pressure to ensure a secure connection between the connector and the cable.
- If the TNC connector uses a soldering method, apply a small amount of solder to the contact pin and the inner conductor of the coaxial cable. Heat the solder with a soldering iron until it melts and flows evenly around the connection. Make sure to avoid overheating the cable or the connector.
Step 4: Secure the Braid Layer
- Fold the braid layer back over the connector body and ensure it makes good contact with the connector's outer shell.
- If the TNC connector has a clamping mechanism, use a screwdriver or other tool to tighten the clamp and secure the braid layer in place. This will help to prevent signal loss and interference.
Step 5: Install the Coupling Nut
- Slide the coupling nut over the connector body and tighten it using a screwdriver or other tool. Make sure the coupling nut is tightened securely but not over-tightened, as this could damage the connector or the coaxial cable.
Step 6: Test the Connection
- Once the TNC connector is installed, use a multimeter or other testing equipment to check the continuity and impedance of the connection. Make sure the connection is stable and the impedance matches the requirements of your RF system.
- If the connection passes the test, you can connect the coaxial cable to your RF device or equipment and test the system's performance.
Tips and Tricks
- Follow the manufacturer's instructions: Always refer to the TNC connector's installation instructions for the specific steps and requirements. Different types of TNC connectors may have slightly different installation methods.
- Use high-quality tools and materials: Investing in high-quality tools and materials will ensure a better installation and a more reliable connection. Cheap or low-quality tools and materials may lead to poor performance or even damage to the connector or the coaxial cable.
- Practice makes perfect: If you're new to installing TNC connectors, it's a good idea to practice on a spare piece of coaxial cable before working on your actual project. This will help you get familiar with the installation process and improve your skills.
- Inspect the connection: After installing the TNC connector, carefully inspect the connection for any signs of damage or loose components. Make sure all the parts are properly aligned and tightened.
Conclusion
Installing a TNC connector on a coaxial cable is a relatively simple process that can be completed with the right tools and materials. By following the step-by-step instructions outlined in this blog post, you can ensure a proper installation and a reliable connection for your RF system. As a TNC connector supplier, we offer a wide range of high-quality TNC connectors and other RF components to meet your needs. If you have any questions or need further assistance with TNC connector installation or selection, please feel free to contact us. We're here to help you find the best solutions for your RF applications.

References
- "RF Connectors: A Guide to Selection and Use," by Mark I. Montrose
- "Coaxial Cable Installation and Maintenance," by the Institute of Electrical and Electronics Engineers (IEEE)